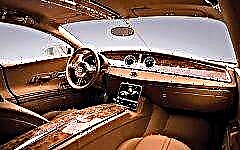
Some time after buying a car, we notice that we are not satisfied with something in it. Some drivers do not like the sound quality of music, others want to get rid of squeaks in the cabin, others want to get more comfort from the ride, and extraneous noises distract them.
By and large, these little things do not affect the driving performance of the car. But on the other hand, an overly suspicious driver will be distracted by extraneous sounds, and this threatens him and passengers. Improvement of the "iron friend" has already become a trend, and car soundproofing will help solve the above problems.
How much does soundproofing a car in a car service cost?

Soundproofing each part of the car has its own price:
| Item name | Price of work, rub. |
| Hood | 2000 |
| Front and rear arches | 5000 |
| Ceiling | 6000 |
| Bottom | 7000 |
| Trunk | 8000 |
| Four doors | 9000 |
If you need to mount a whole set, then many car services offer package services:
| Package name | Incoming services | price, rub. |
| Economy | Cover for floor, trunk, including lid, arches, doors | 14 - 28 thousand |
| Standard | Ceiling treatment, floor sound insulation, arches, trunk, hood, doors | 18 - 35 thousand people |
| Suite | Full processing of the bottom, soundproofing of all wheel arches, the ceiling, the trunk together with the inner compartments, the outer side of the trunk, the hood, complete soundproofing of all doors, installation of anti-creaks throughout the body | 24 - 50 thousand |
The package price depends on the class of the car: small, medium, business, SUVs (minivans), SUVs.
To save money and get confidence in the quality of the work performed, you can do the car soundproofing with your own hands. Of course, this will require certain skills, patience and time, and we will provide detailed instructions with a description of how to quickly disassemble the salon, what and where to stick it.
If the budget is limited, it is important to decide for what purpose you need sound insulation and, based on this, isolate the doors, floor, trunk or other elements separately. With sufficient material resources, you can make "Shumka" entirely.
On average, the process will take two to three days. It is better to equip a place for work in a garage or other enclosed space so that changes in the weather do not distract you from your work.
What materials and tools are used for noise insulation

Depending on which parts we will insulate, we will need different materials:
- It is possible to remove the vibration of metal elements with the help of mastic or bituminous vibration isolators. The viscous structure dampens vibrations. The thickness of such vibration isolation is 2-5 mm. These materials are used as a base layer for gluing the metal parts of the machine.
- As the next (additional) layer, we glue a heat and noise insulator. It should not be ignored, because it will help not only protect the car from noise, but also maintain a comfortable temperature and absorb excess moisture.
- With the final layer we attach the self-adhesive polyethylene foam "Shumka". It is designed to absorb a significant amount of foreign noise.
- If you are worried about creaks in the gaps between the elements of the cabin, then we use anti-creak materials. They are made in the form of thin strips, which can easily "clog" hard-to-reach places.
One of the most common vibration isolators is the Silver vibroplast. The bitumen-mastic vibration damper is made in the form of a self-adhesive metallized material with a 5x5 cm square marking, which makes it easy to cut the sheet into elements of the required size.
Vibration absorber Silver is distinguished by its flexibility, elasticity, anti-corrosion properties, sealant qualities, moisture resistance, ease of installation even on difficult-to-surface surfaces. Usually, the vibration absorber is warmed up with a building hair dryer before installation, but Silver does not need it. Material weight - 3 kg / m2 with a thickness of 2 mm.
Vibroplast Gold has the same characteristics as Silver. However, its 2.3mm thickness provides better vibration isolation. Vibration damper weight - 4 kg / m2.
Vibration absorber BiMast Bomb is a new generation multilayer material. The first layer is made of metal foil, then there is a layer based on bitumen, and after that - a layer based on rubber. Before installation, the vibration absorber needs to be heated to 40-50 degrees. BiMast Bomb is considered one of the best vibration isolators. Sheet weight - 6 kg / m2, thickness - 4.2 mm. Elastic sheets are easily cut with a knife or scissors.
Heat-insulating self-adhesive "Barrier" is made on the basis of polyethylene foam. With its help, the floor of the passenger compartment and the luggage compartment of the car are insulated.
Splen 3004 adhesive sound insulation has good thermal insulation and moisture-repellent characteristics. Due to its flexibility, it is easy to mount on surfaces with complex relief. The sound absorber has a weight of 0.42 kg / m2 with a thickness of 4 mm. There is also the 8mm Splen 3008 and the 2mm Splen 3002.
This sound insulator can be operated in the temperature range from minus 40 to plus 70 degrees. Splen in the form of adhesive tape is applied at ambient temperatures from plus 18 to plus 35 degrees. At temperatures below plus 10 degrees, its adhesive properties deteriorate.
The efficient Accent Premium noise damper dampens engine noise. It is also used to insulate the roof, doors, trunk. It reduces the noise level by 80%.
Effective sound absorber Accent 10 has good thermal protection characteristics. The lower layer is adhesive, the middle layer is flexible polyurethane foam, the upper layer is foil film. The performance of the sound insulator is limited by the temperature amplitude from plus 40 to plus 100 degrees. Its weight is 0.5 kg / m2, thickness is 10 mm. Accent 10 eliminates up to 90% of noise.
The sound absorber and sealant Bitoplast 5 (antiskrip) is made on the basis of polyurethane foam. It has an adhesive layer, which is protected by an anti-adhesive gasket, and a special impregnation. Differs in moisture resistance, long service life, excellent thermal insulation qualities, which are maintained at temperatures up to minus 50 degrees. In addition to absorbing noise, Bitoplast 5 removes squeaks and rattles in the cabin. With a weight of 0.4 kg / m2, it has a thickness of 5 mm. The 10mm Bitoplast 10 is also available.
The sealing and decorative material Madeleine has a black fabric base and an adhesive layer protected by an anti-adhesive pad. Its thickness is 1-1.5 mm. It is used to eliminate gaps between the car body and decorative parts of the passenger compartment, gaps in the dashboard, and seal air ducts.
All of the above materials cost about 2,500 rubles per set of sheets. But you can purchase other similar materials as well.
From the tools we need to acquire:
- a building hair dryer to heat the vibration isolator (you cannot use a home hair dryer to dry your hair instead, as it is ineffective);
- a stitching roller for rolling sound insulation;
- scissors for metal or a stationery knife for cutting material;
- a set of tools for dismantling the interior trim;
- a set of spanners or open-end wrenches;
- large ratchet with rigid extension;
- heads on "14" and "17" or a powerful pneumatic impact wrench;
- a screwdriver with a bit with a length of 7 cm or an electric screwdriver to save time for dismantling and reassembling fasteners;
- Phillips screwdriver
- a TORX screwdriver for loosening the bolts on the doors;
- small ratchet;
- head on "10" with an extension;
- clip removers;
- solvent (gasoline, anti-silicone, acetone or white spirit is suitable - it will degrease the surfaces before gluing the vibration isolator);
- microfiber for degreasing elements with a solvent. This step cannot be ignored, since the degreaser increases the adhesion between metal surfaces and the adhesive layer of the vibration isolator.
All work is done with gloves.
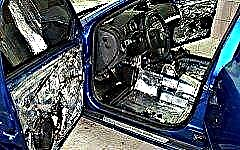
Salon parsing

The very first stage in organizing the soundproofing of a car is considered to be the analysis of the passenger compartment. First, we read the manual for the car, and then we proceed to parsing:
- Using a couple of screwdrivers, we remove all the plastic, with the help of clip removers we dismantle the clips that fasten the carpet to the floor, take out the carpet from the floor, throw off the ceiling and leave it in the car (if we cannot pull it out), disassemble the door trims and dismantle the center console.
- Using a large ratchet and heads on "14" and "17", a spanner or open-end wrench or a pneumatic wrench, unscrew the seat belts and seats and take them out of the passenger compartment.
- We remove, but do not discard the factory soundproofing of the hood (if any).
- Using a small ratchet and a "10" head, unscrew the hooks, staples and other "holders" under the rear seats and in the trunk. We dismantle the elements of the rear of the cabin.
At the same time, be patient, as it can take 2-2.5 hours. When disassembling the interior, we lay out all the bolts and screws in separate jars: for doors, floor, luggage compartment, center console. This way you will not mix them up when reassembling.
Soundproofing doors

The easiest way is to soundproof the doors. Let's start with them. In addition to the above tools, we need clips with which the door cards are attached to the door frame, since they sometimes break when removing the trims and other interior parts. Operating procedure:
- We clean and degrease all internal parts from dirt.
- We install a vibration isolation layer with a thickness of 2-3 mm. To do this, we measure the inner surface of the door and cut the sheets into pieces of about 180x250 mm in order to make it easier to work.
- We mount the first section of the vibration damper and roll it in with a roller to remove air between the material and the door surface, ensuring the most tight fit of the vibration damper.
- We install "Shumka" with a thickness of 10 mm, pre-cut into pieces of 18-25 cm.
- We go over the entire surface with a roller.
- We apply an effective sound absorber to all recesses.
- Again, carefully roll the material with a roller.
- We mount all the door details back.
To achieve the best effect and create an acoustic box inside the door that provides a better sound from the speakers, we block the holes for the speakers with vibroplast, as well as the door opening handles, fastening the window handles and other technical holes.
But here it is important to take into account the weight of the materials, otherwise after some time the door will begin to sag and will require replacement of the hinges. Rear doors usually do not have speakers, so soundproofing is easier.
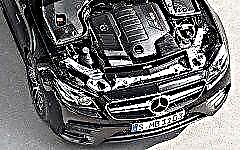
Bonnet soundproofing

Soundproofing the hood does not quite help to drown out the noise of the power unit. But it insulates the motor well in the cold season. We perform work taking into account the weight of the material. Weighting the hood too much will cause the shock absorbers to leak. If there is a factory sound absorber, then the sound absorber is selected taking into account its thickness. If it is not, then we use the thickest, 15-mm "Shumka".
- We install a bitumen vibration isolator on all parts between the stiffeners, since only such a material can withstand high temperatures.
- We return to the place the factory noise isolator.
- If it was not there, we mount our "Shumka".
It is not recommended to install the vibration isolator on the stiffening ribs, since this will not allow the factory "Shumka" to stand in place.
Soundproofing the floor

But the soundproofing of the floor can just prevent the sound of the power unit from penetrating into the cabin. In addition, it protects various parts from bouncing. This process is quite laborious, but it allows you to eliminate the bulk of the noise:
- We clean and degrease all metal parts from dirt.
- We glue the joint to the joint a vibration isolator with a thickness of 4-4.2 mm. Carefully roll the entire surface with a roller, otherwise the remaining air will condense and provoke rusting.
- The next layer is to install a 10 mm noise isolator.
- We glue the wheel arches from the passenger compartment with a thick sound-insulating material with two or three layers.
- We remove the remaining air with a stitching roller and ensure tight gluing of the vibration absorber with the noise absorber.
- We mount the back upholstery and the dismantled elements.
Now we will not be annoyed by the blows of small stones on the bottom of the car.
Roof soundproofing

In rain or hail, all the sounds of the elements penetrate through the roof into the cars. "Shumka" will help to partially cope with this. If the roof is additionally glued with a heat insulator, a comfortable microclimate will remain in the cabin.
- We carefully remove the remnants of factory glue from the ceiling with a solvent.
- We make paper stencils between the stiffeners, cut out a vibration damper along them and mount it on the roof with the first layer.
- We also cut out the sound absorber using the stencils and install it in the next layer. We carefully roll the surface.
- Mount a heat insulator on top of the sound absorber.
- We collect the ceiling sheathing.
When choosing materials, we again take into account the weight, because a car with a heavy ceiling has a higher center of gravity, and this can impair handling.
Trunk soundproofing

The trunk resonates with noises from the underbody, muffler and other parts of a moving car. In addition, the load transported in the trunk can also make noise when driving. With the help of sound insulation of this element, you can comprehensively solve the problem, and at the same time reduce the heat loss of the machine.
- We clean the trunk of debris.
- We make paper patterns for the side walls, inner rear fenders and the trunk lid, cut out parts from the vibration absorber along them and glue them to the corresponding elements of the car.
- We roll on all surfaces with a roller, paying special attention to the edges.
- The next layer is to install a noise absorber.
- The third layer is to install sound insulation.
- We return back the trunk lining.
Competent noise insulation of the entire car will reduce the noise level in the cabin by 60%. In the process of work, do not rush, and if something did not work out right away, do not give up. Show patience, and then you will succeed.

|| list |
- How much does soundproofing a car in a car service cost?
- What materials and tools are used for noise insulation
- Salon parsing
- Soundproofing doors
- Bonnet soundproofing
- Soundproofing the floor
- Roof soundproofing
- Trunk soundproofing